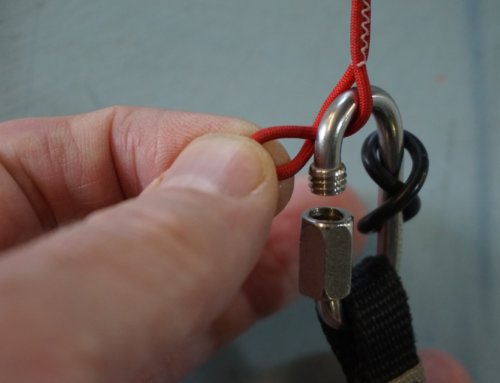
The lines of our paragliders have loops at each end to connect the maillon, to other lines or to the line tab on the canopy. But how are the loops made, and is there anything we should look out for?
In the early days of paragliding all lines used were sheathed. Unsheathed lines first appeared on higher performance wings as designers looked to reduce line drag. Nowadays the use of unsheathed lines on the upper cascades is commonplace, and even some EN B gliders use entirely unsheathed linesets. Whether the line is sheathed or unsheathed determines how a loop is formed, as there are two entirely different methods used.
When we make a replacement sheathed line in the workshop, the first task is to seal the end of the sheathing. We do that by drawing back the sheathing to expose the core so we can cut the core so that it is slightly shorter than the sheathing. Then the sheathing is drawn back over the core and heat sealed. The sheathed line is folded to length with the right overlap and sewn with a zigzag stitch, with alternate stitches going through the centre of each side of the loop.
Loops on unsheathed lines are formed by splicing the end of the line inside the line on the other side of the loop (see pics 1 – 3). When the line is under tension, the weave of the filaments causes the outer line to lock on to the inner line so tightly that reinforcing sewing isn’t needed at all! We do in fact put a short run of straight stitching in place, but this is just to make sure the loop doesn’t slip if the line were to come under compression, for example, during packing away.
There are other precautions that can be needed to form safe loops on unsheathed lines. The first on is that in some cases, a section of sheathing is added just for the loop itself. This can protect the line from wear damage at the maillon, particularly important is soft shackles are fitted to the risers. The other precaution can be to splice in a short section of reinforcing material inside the line at the point where the loop is to be formed.
Where do lines tend to break, if they’re undamaged? Well, in our strength testing of thousands of lines, it’s rare that the loop fails. On unsheathed lines, sometimes the line will break just below the point where the splice ends because this point of discontinuity is a point of weakness. At a knot or at the end of the splice, stress can become concentrated on fewer filaments, so this is where a failure is more likely to occur.
Occasionally the stitching on a sheathed line will fail, but commonly sheathed lines break just below the end of the loop, at the point where the stress transfers from two lines to one.
Knowing this, is there anything we should particularly watch for? Well, it’s worth making sure that the stitching of loops on sheathed lines isn’t damaged. If one or two stitches are loose at the end of the stitching, get them sorted in case they start to unravel further. And take care to see if the sheathing is damaged where the loop goes round the maillon, as this can sometimes be more difficult to spot.
There’s little that can go wrong with the loop on an unsheathed line. Sometimes any inner reinforcing material can pop out, and if this happens at the maillon end, it’s rarely of concern. It’s more important to address if it happens at the end looped onto other lines.
Tieing on brake handles
If you have to retie your brake handles, how should you go about it? There are many different knots that can be used, but our standard is a bowline with a stopper knot. This is a very secure knot which is also fairly easy to untie if adjustment is needed.
- Make sure that the line away from the handle goes over the line coming from the handle in the first loop (pic 4).
- Feed the free end into the loop, passing over one side and under the next, and then take the free end over the line again (pic 5).
- Then feed it back through the loop from under the loop (pic 6).
- After tightening the knot (pic 7), tie a simple overhand stopper knot.
If you want to chat anything through, we’re always happy to offer help and advice over the phone (01433 627195) or by email (info@aerofix.com).


