Find out about fitting a replacement line and how to ensure it matches your existing lineset by fitting different loops at the maillon if necessary.
Fitting a replacement line is something that can be done by most pilots given enough time, space and patience. But since linesets are prone to shrinkage, what should you do if the replacement line, made to specification, is longer than the line it replaces?
Damaging a line can be really frustrating when you realise that you need to get it replaced before you can safely fly again. Sending your glider in to a repair workshop can delay the process and involve shipping costs, both of which can be avoided if you’re happy to order the line and fit it yourself. Whilst there are advantages to this approach, there are a few pitfalls you need to make sure you avoid.
The first is making sure you identify accurately which line is broken. It’s not hard to get hold of the lineplan for your glider – often you can download one from the manufacturer’s website if you don’t have a lineplan already. [And since March 2019 you can find lineplans at aerofix.com]. The labelling convention some manufacturers use can be a bit confusing at times, but almost all more recent wings will have a diagram showing a code to identify each individual line. That’s what we or any anyone else needs to reference the detailed manufacturer’s specification of the type of line material to use, the length and any other relevant detail. I wrote about lineplans back in November 2017.
When we replace a line on a glider we have in the workshop, we’re able to make sure the fitted line matches the lineset on the wing. Almost all lines shrink over time: Dyneema lines tend to settle in over the first 25 hours of flying, and whilst the length of Kevlar lines tends to vary much less, their length can change over time, particularly if the glider is exposed to water, high humidity or extremes of temperature.
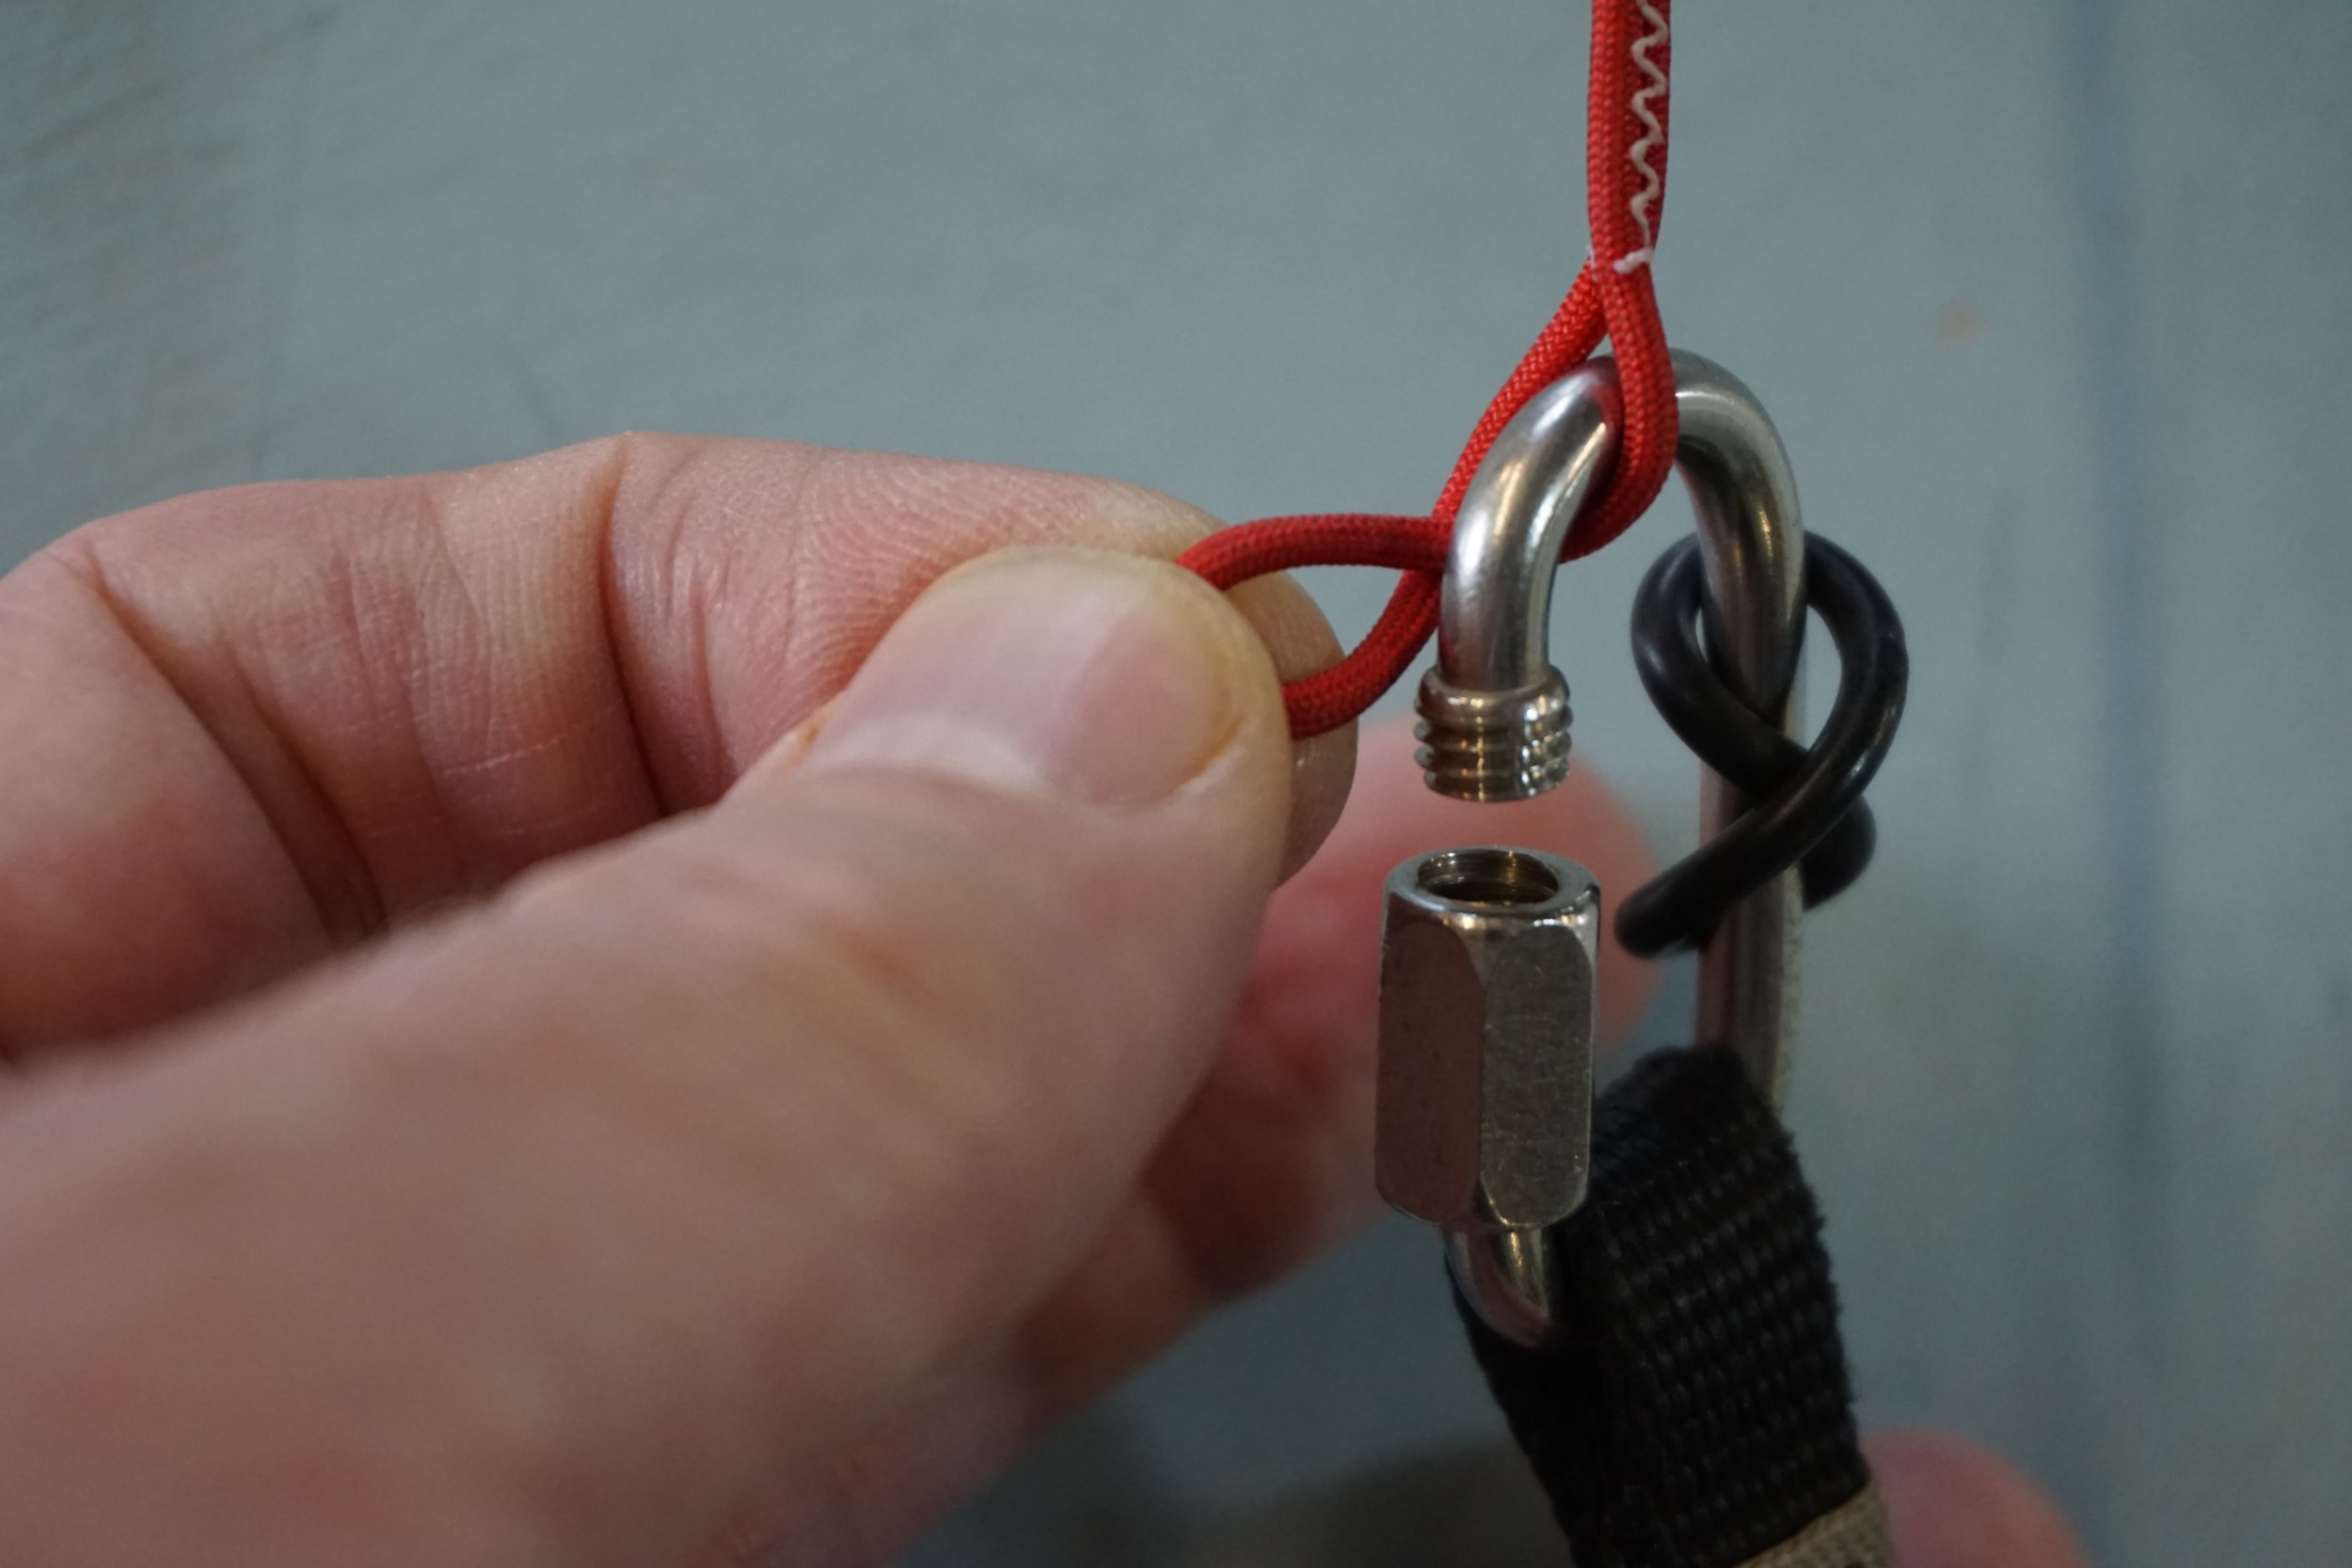
Pic 1: Forming a double loop
So if we take a line off in the workshop to replace it, we will always measure it first before deciding what length to make the replacement. If the line has been broken, then we’ll examine the corresponding line on the other side of the wing, as shrinkage tends to operate similarly on both sides. Armed with that information as well as the original specification, we can decide what length to make the new line.

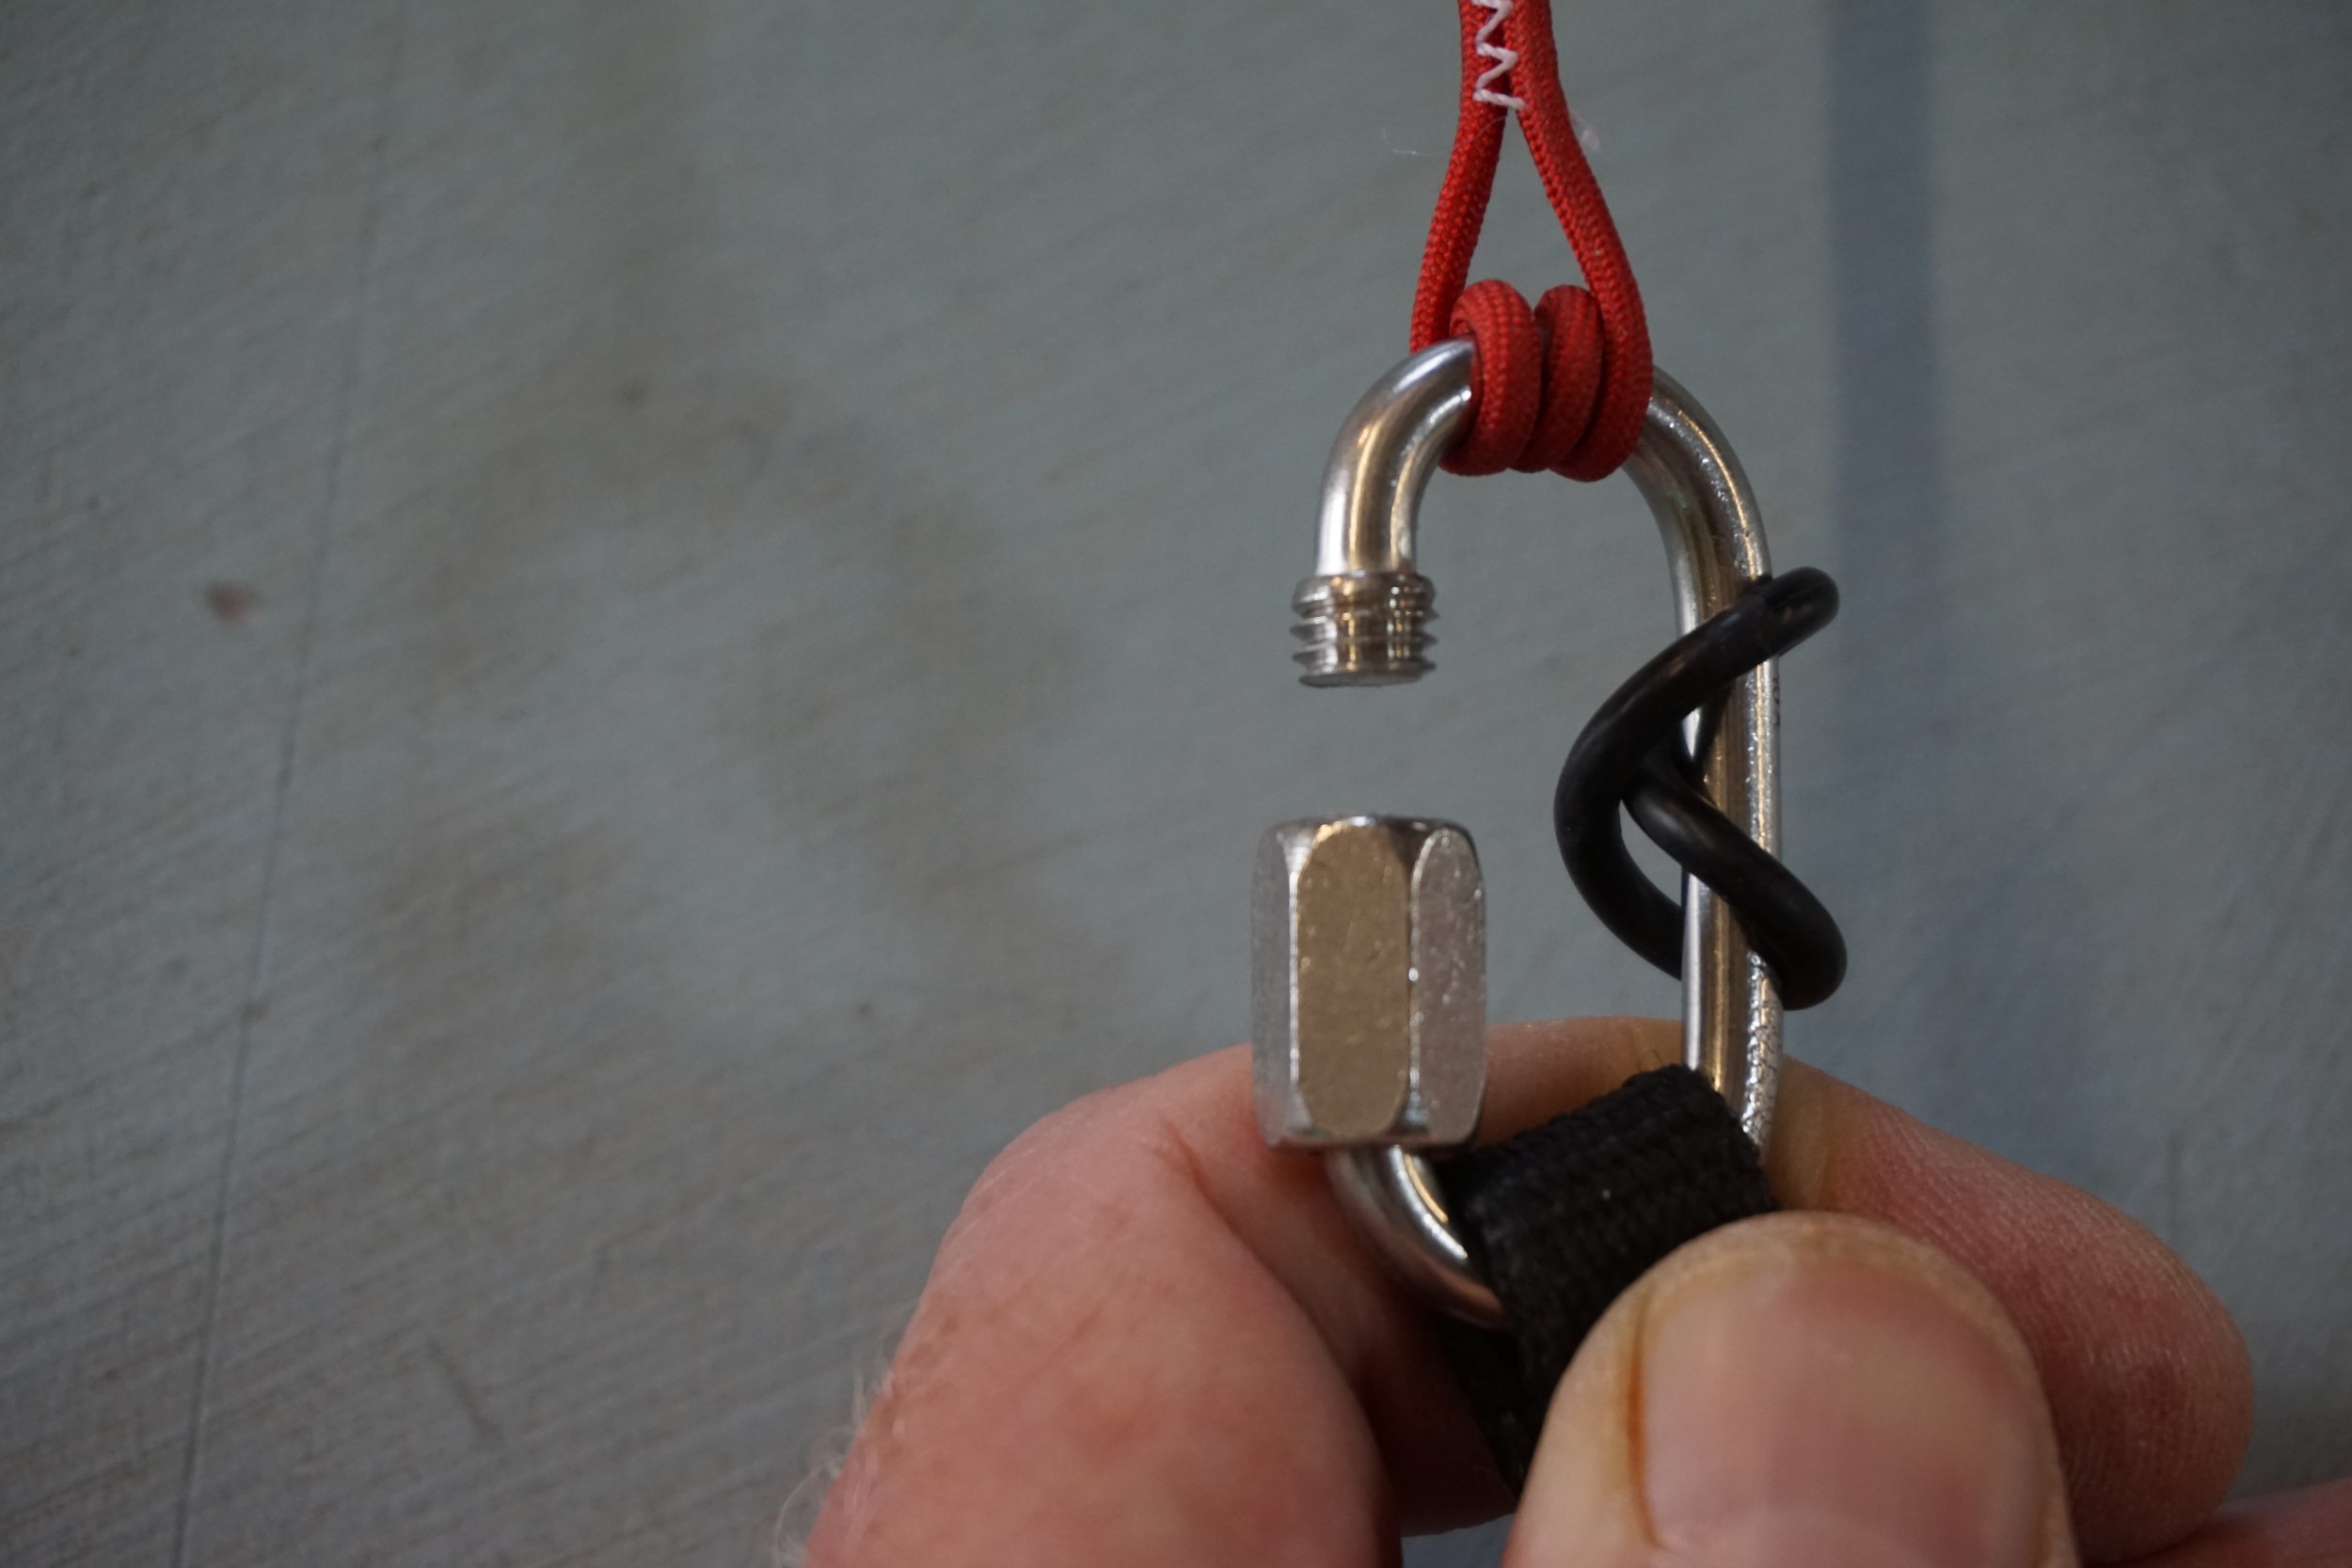
Pic 2: A double loop fitted
However, it’s not a simple as making the new line the same length as the old one. If we were to do that, it’s reasonable to expect the new line might well follow the same pattern as the original, and shrink over time. In turn that might mean the replacement no longer matches the rest of the lineset once this has happened, and if it is then too short, it might even need to be replaced again.
In general, for a main line, we will make the replacement line to the manufacturer’s specification, and fit the replacement with an appropriate additional loop at the maillon to reduce the effective length to match the old line. And then at a subsequent trim of the glider, the additional loop can be released, if appropriate. There are exceptions to this, but going into them is more complicated than I can cover here.
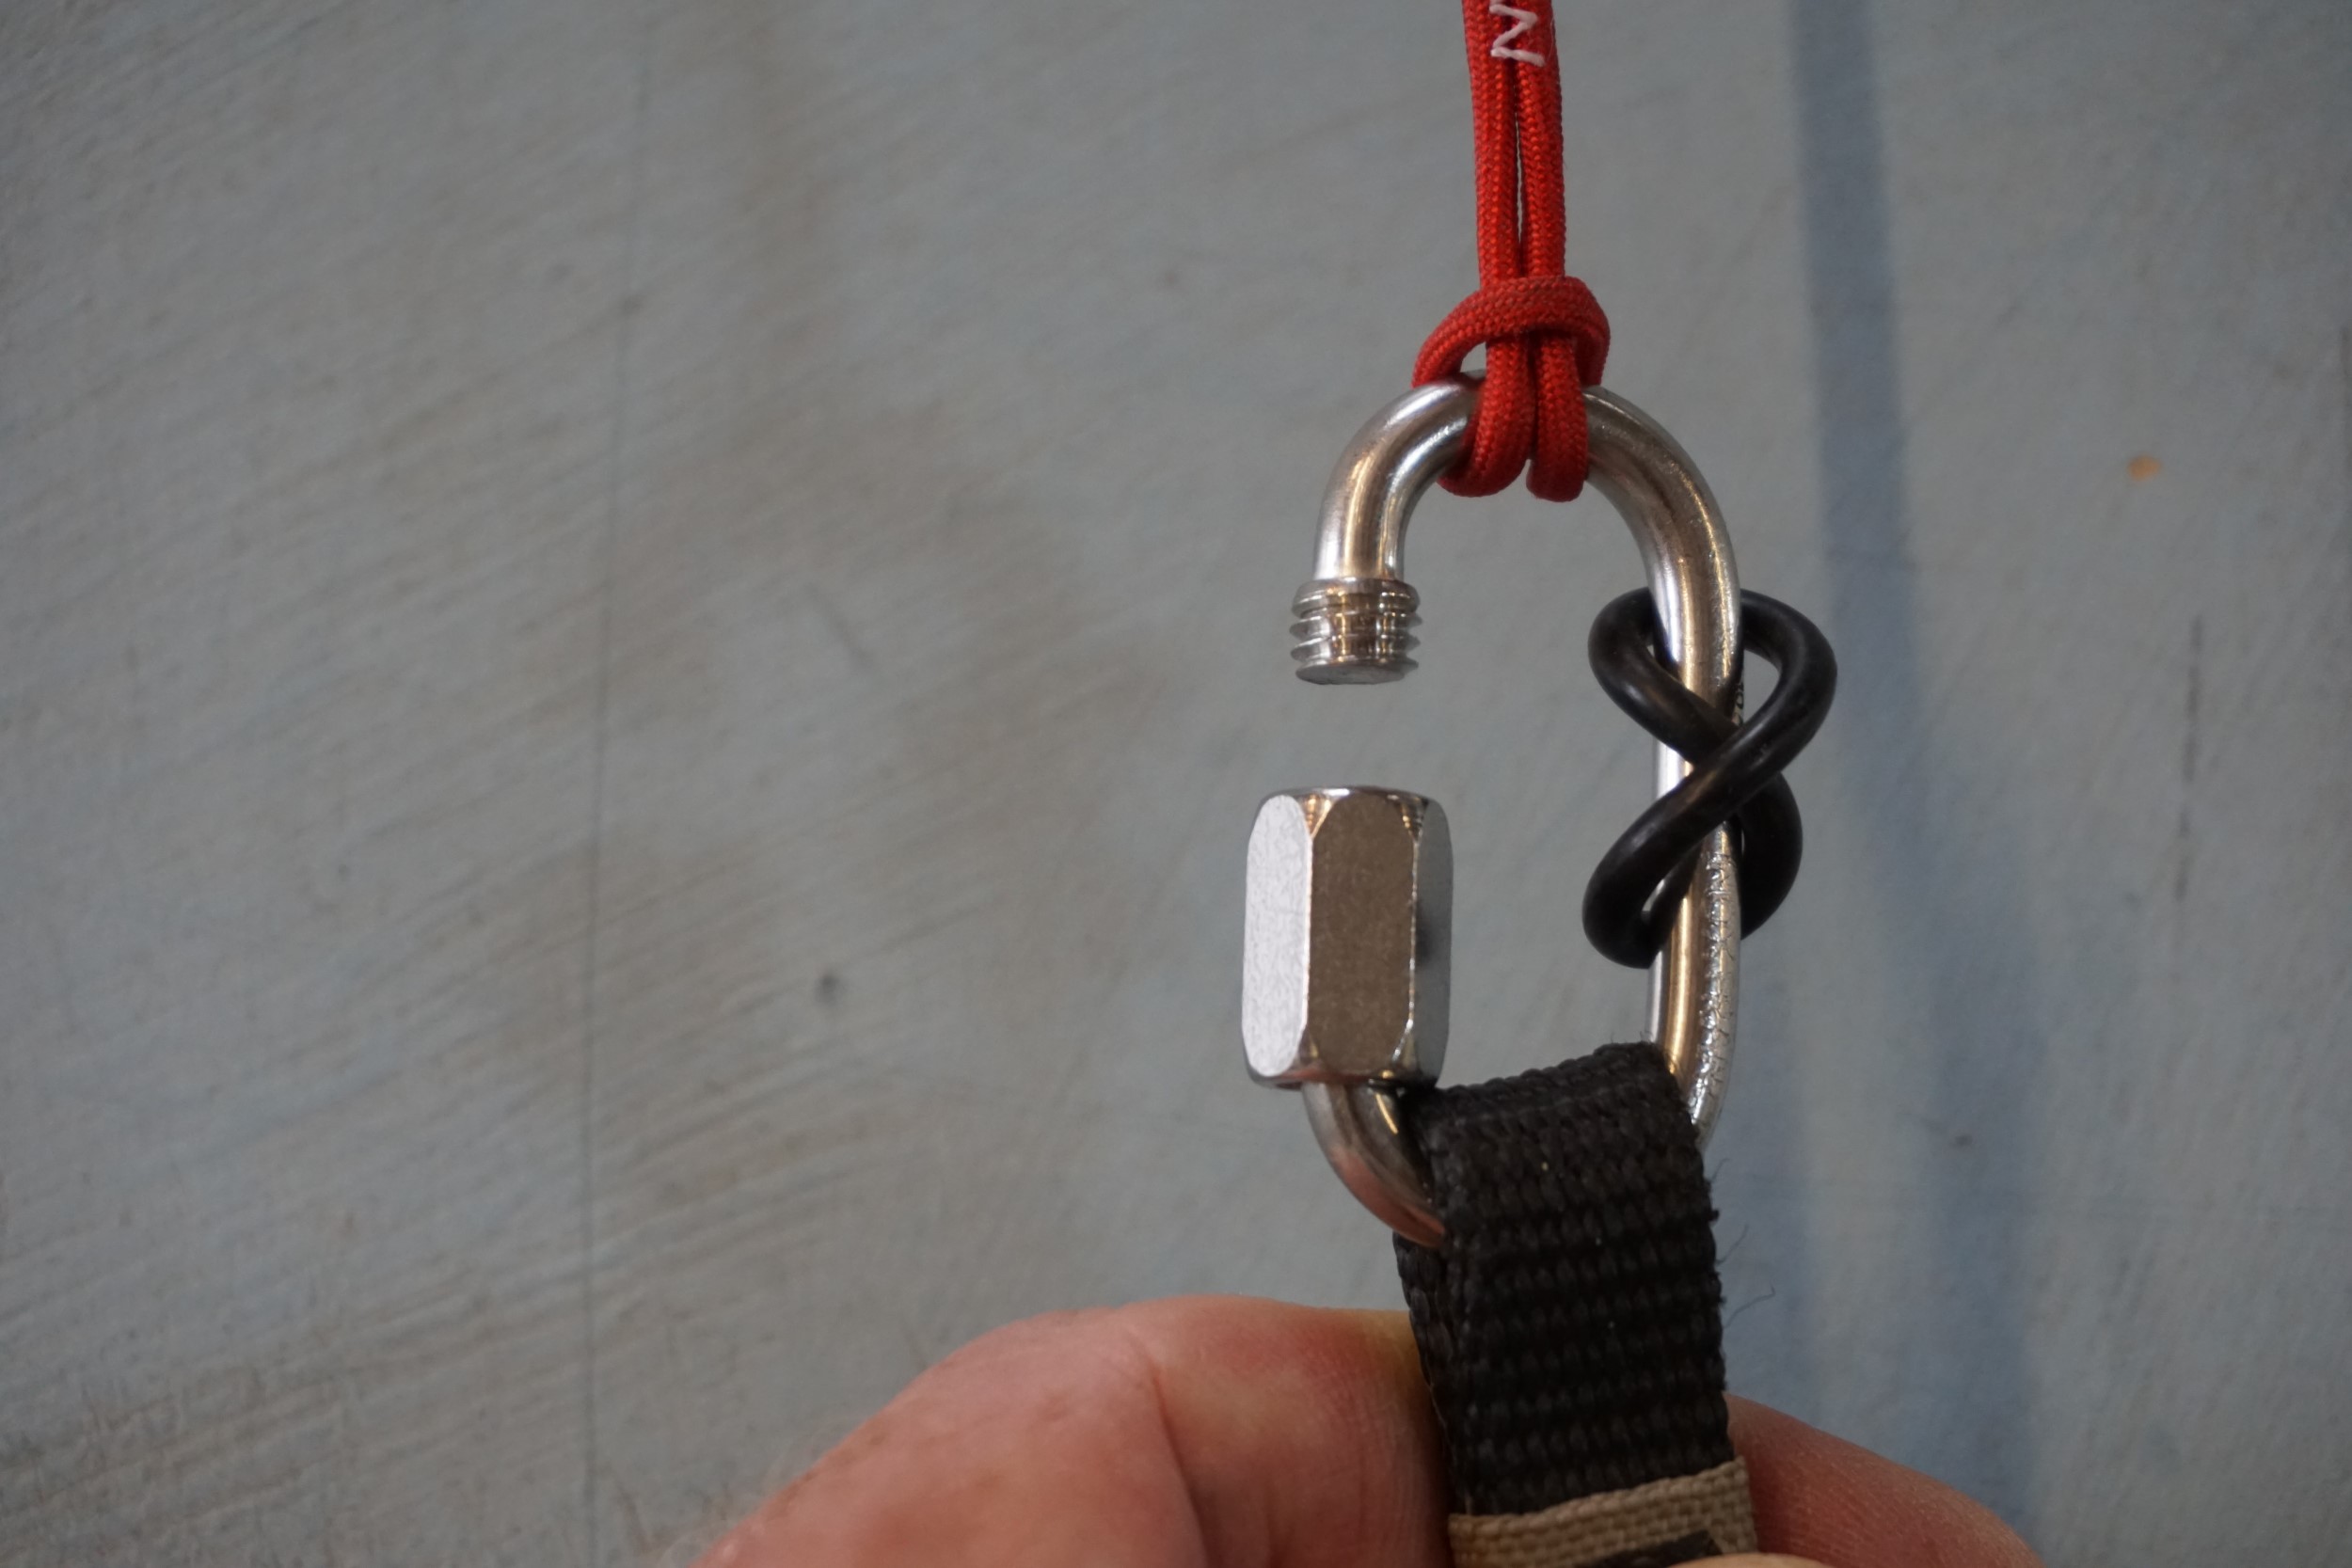
Pic 3: A triple loop fitted
So, back to the second pitfall to avoid if you’re fitting the line yourself: before you fit it, make sure it looks like the length matches the line you’re replacing. That can be more difficult away from the workshop, without the means to ensure the lines are measured under a standard tension, but it is nonetheless an important check to make. At the very least this should confirm that there’s been no confusion over which line was needed. If you find that the replacement line is longer than the old one (or the corresponding one on the other side) then you should do the same as we would in the workshop: fit with additional loops at the maillon to reduce the effective length (See guidance on how to do this below).
Bear in mind that manufacturers specify a tolerance of ±10mm for overall line lengths from maillon to the surface of the wing, but that’s primarily intended to allow for variation in lengths that arise in use, and not from manufacturing inaccuracies: for example, when we make a replacement line in the workshop, our standard is within 1mm of specification. However, the tolerance shows you there is some leeway here if the replacement line differs slightly in length.
The final pitfall to avoid is making sure that your lines are not tangled after fitting the replacement line. That’s worth checking both immediately after fitting the line, and again when you inflate your wing next, just before flying.
Fitting additional loops at the maillon
If the effective length of a replacement line needs reducing, there are a variety of different loops that can be used. Three of the simplest are outlined below:
-
The double loop shortens the effective length by around 9mm (pictures 1 and 2 above)
-
Adding another loop to make a triple loop takes off around 18mm (picture 3 above)
-
In between these two, a larksfoot, has a 14mm impact (pictures 4 and 5 below).
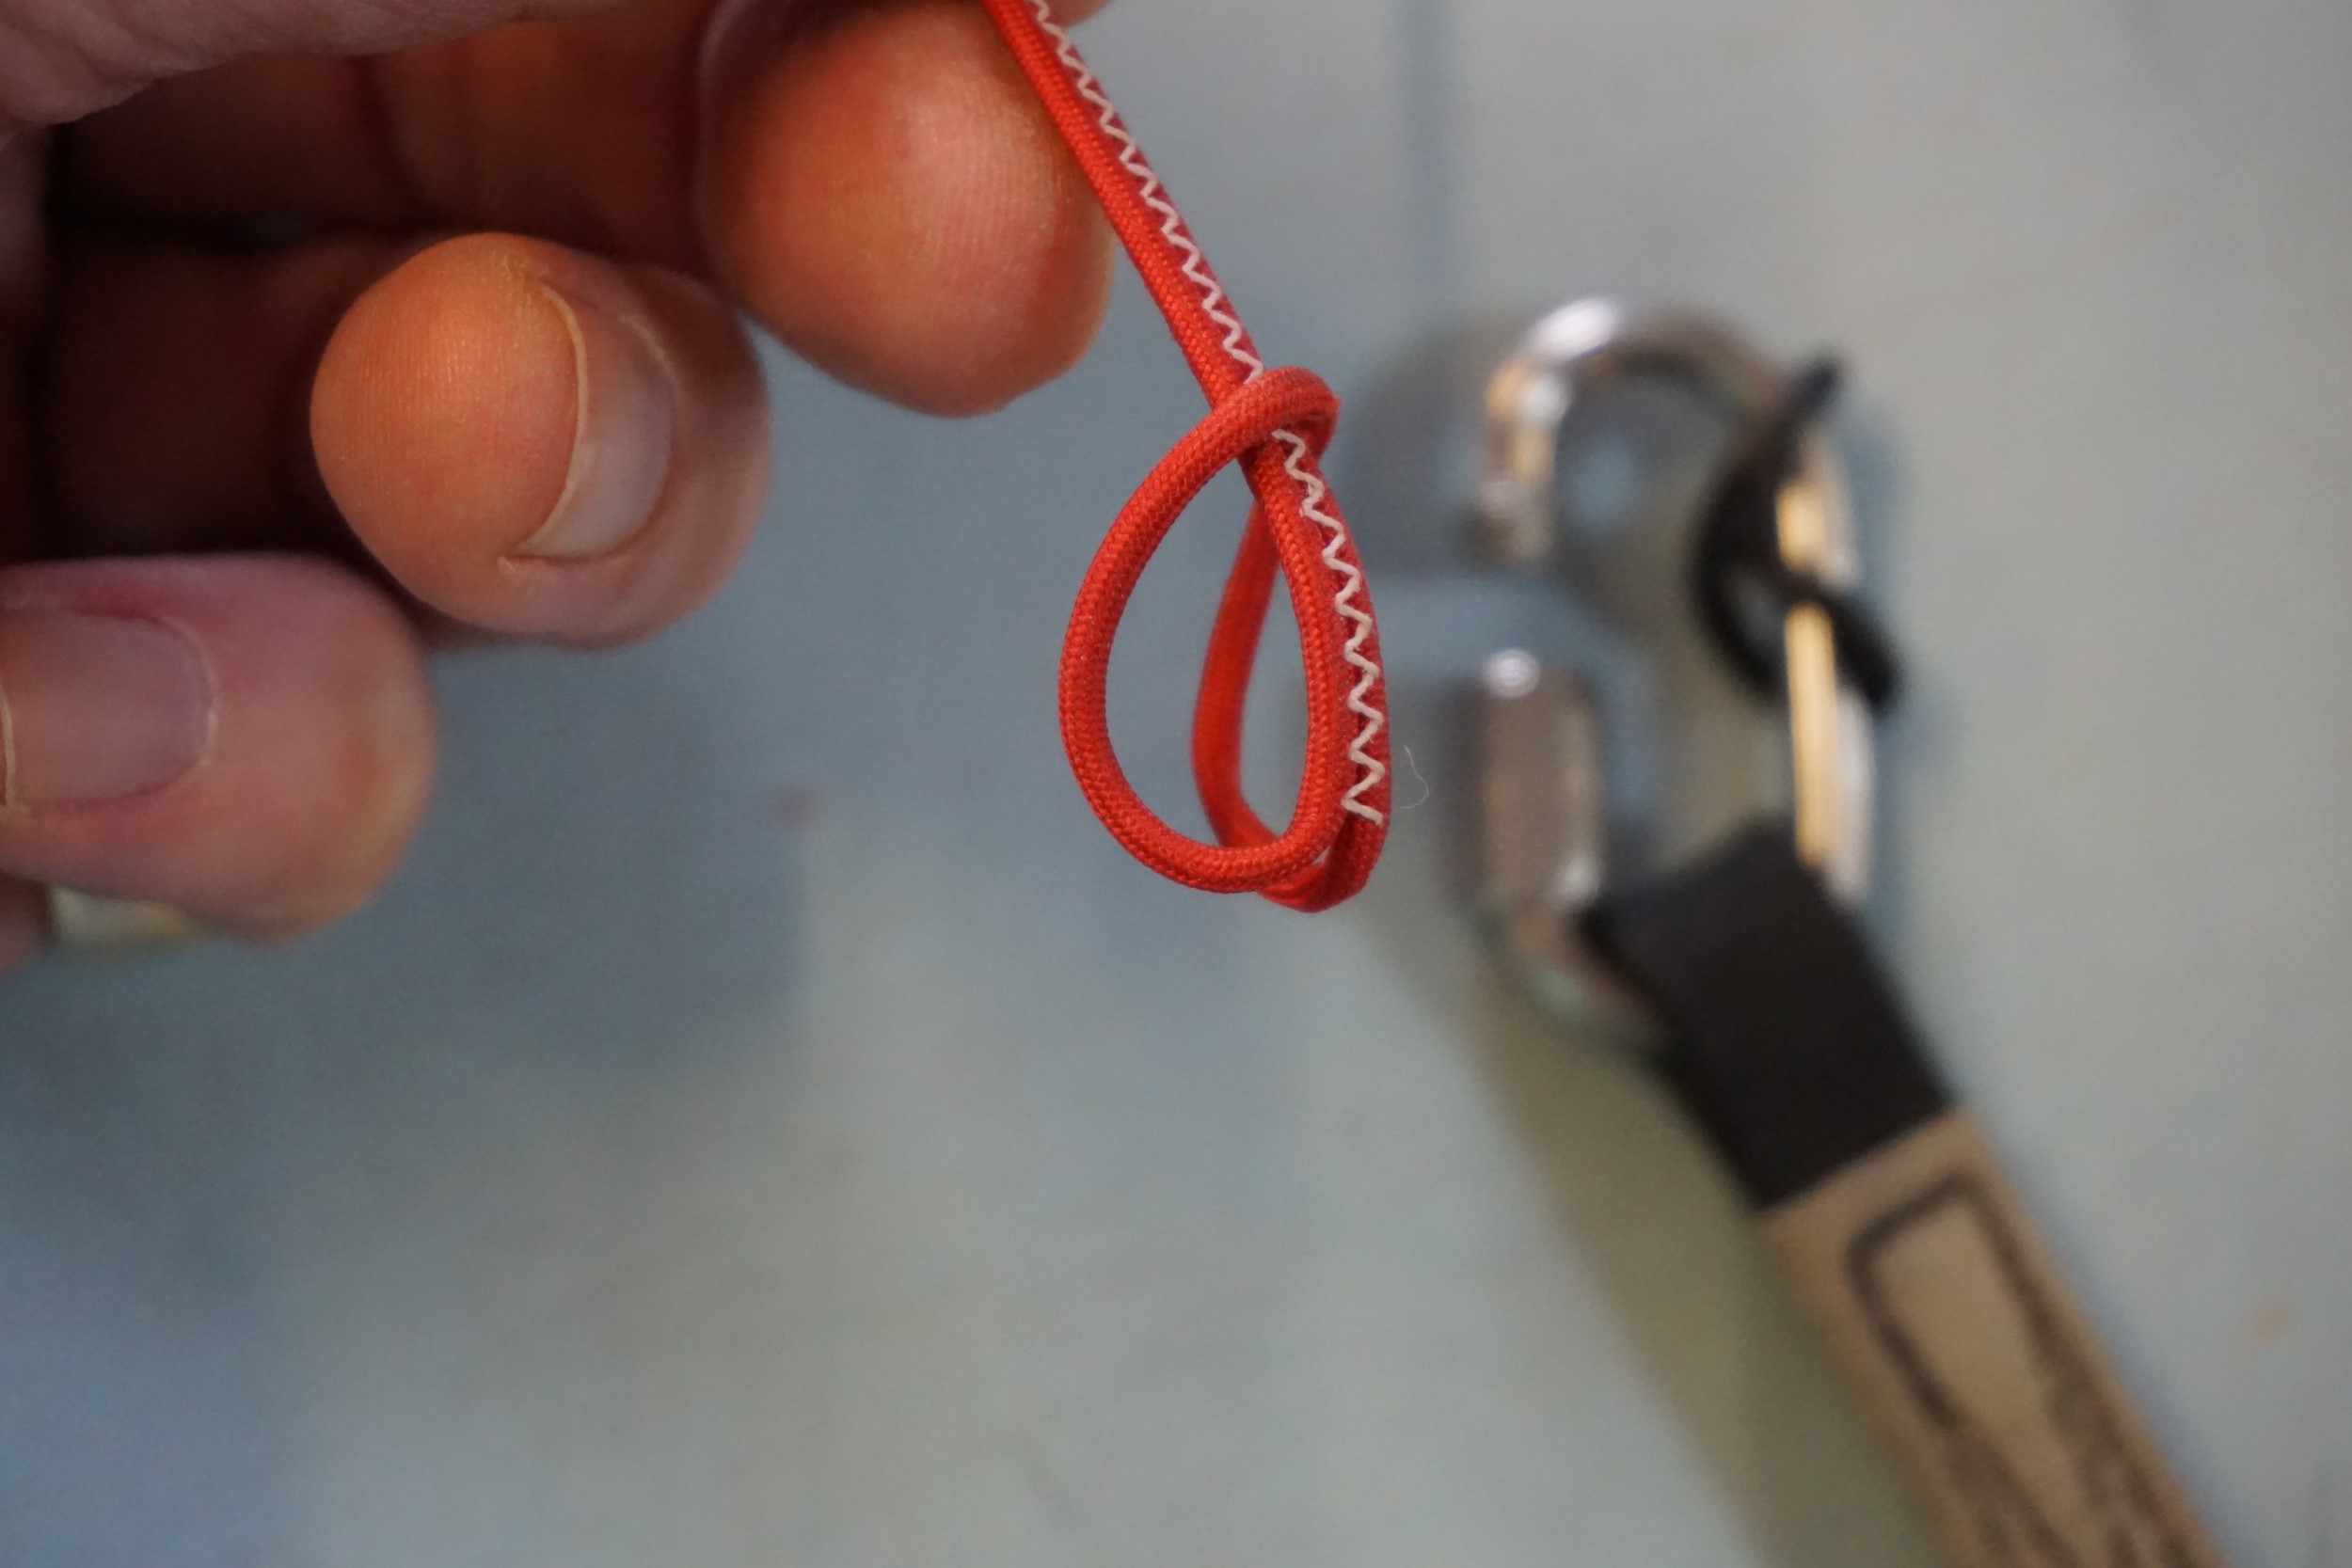
Pic 4: Creating a larksfoot loop
Pic 5: Larksfoot loop fitted